TCP Coilover conversion
|
|
TCP Coilover conversion |
TCP Coilover Conversion |
 One
of the major shortcomings of classic Mustangs is their handling
characteristics. The stamped steel design and rubber bushings of the factory
suspension allows unwanted deflection. The end result is an overly "soft"
suspension system with sometimes unpredictable handling characteristics. One
of the major shortcomings of classic Mustangs is their handling
characteristics. The stamped steel design and rubber bushings of the factory
suspension allows unwanted deflection. The end result is an overly "soft"
suspension system with sometimes unpredictable handling characteristics.
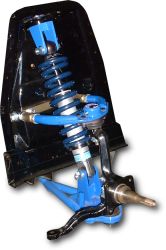
Finally a bolt-on kit to convert your classic over to a more modern suspension system. See what it takes to make a classic Mustang better than new.
|
 1) Our first step in making the conversion is to remove the old stock components to make room for the new suspension. |
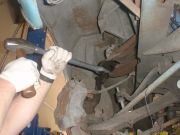
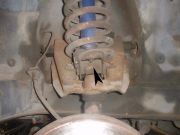 2) The hardware attaching the lower end of the shock to the spring perch is removed. |
 3) The upper shock mount and factory export brace will need to be removed to lift out the original shock. |
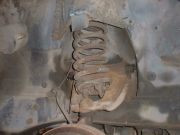 4) Next, the coil spring needs to be removed. We were not planning on keeping the old springs, so a torch was used to heat the springs to relieve the tension. If you will be keeping the springs a spring compressor is needed. Coil springs have a very high "load" and can potentially cause injury. |
 5) After removing the cotter pins and nuts, seperate the spindle from the upper and lower ball joints. A strap was used to hang the caliper from the undercarriage in order to save the brake lines. |
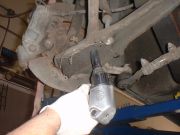 6) Unbolt the stock strut rod from the lower control arm. |
 7) Unbolt the stock strut rod from the frame mounting location, then remove. |
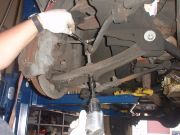 8) The anti-roll bar is then disconnected from the lower control arm. |
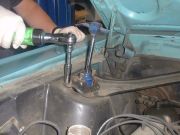
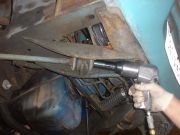
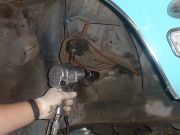 9) With a impact gun you may be able to remove the upper control arm bolts from the wheel well side. Otherwise you will have to remove the nuts on the engine side of the shock tower. |
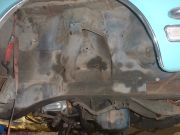 10) Finally a clean slate to start with. |
We found that the removal of the factory components was the most difficult part of the conversion. Now that the dirty work is out of the way we can bolt in the new suspension. |
|