T-5 Swap
|
|
T-5 Swap |
Courtesy of Richard Ireland
Putting a T-5 transmission into an early model mustang is a straight forward swap that anyone can accomplish. The major difference in how you perform the swap is which bell housing you use, the original bell housing or the later model bell housing.
You can use the original bell housing or a later model bell housing, No matter which you use they have to be slightly modified. If you use the original bell housing it has to be modified to accept the T-5 transmission. If you use your original bell housing a spacer plate must be used and the bell housing must be machined to change the location of the transmission mounting bolts. Sacramento Mustang offers this service as do others (I know Mustangs Unlimited offers this service also).
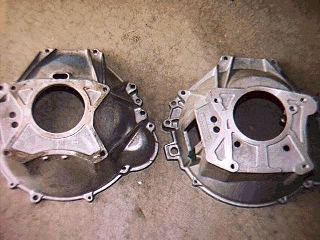

The original bell housing on the left is shorter than the later model bell housing on the right and requires a spacer plate to make up the difference.
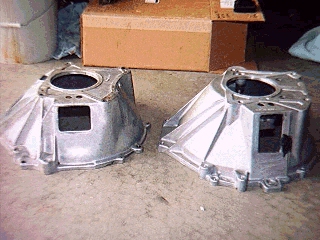
I decided to go with the later model bell housing which is taller than the early model bell housing to accommodate the longer input shaft on the T-5 transmission. To make up for the difference in the input shat length and maintain the correct position for the clutch release lever you have to reposition the clutch release lever pivot. If you use the later model bell housing you put a spacer kit between the clutch release lever pivot and the bell housing to reposition the lever to the correct position. You can purchase the steel spacer from Sacramento Mustang (and others). For those that have the tools or skill you could always make the block yourself. It is a ¾ inch block of steel with two holes that match the holes where the lever pivot mounts to the bell housing.
The spacer is used to reposition clutch release lever pivot point the same distance from the clutch as with the original bell housing. To install the spacer remove the pivot from the bell housing and place the spacer inside the bell housing where the pivot was. Mark the 2 holes and then drill the holes through so that you can bolt the spacer and the fulcrum to the bell housing. The spacer comes with 2 flush mount allen head bolts, place the pivot on top of the spacer, put the bolts through the holes from the outside of the bell housing, and bolt the assembly in place. Sacramento Mustang also sells the bell housing already modified if you do not have one or do not feel like doing the work yourself.
Depending on which bell housing you use you may have to also change the dust shield. The original dust shield is not the same size as the later model bell housing and will extend about 1 inch below the later model bell housing. I purchased a dust shield to go with the later model bell housing which fits with no modifications.
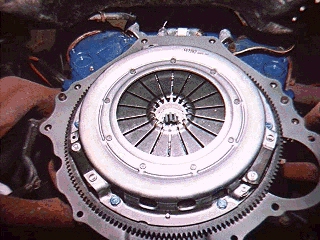
Once you have the bell housing straightened out the rest of the swap is pretty much the same as changing a clutch.
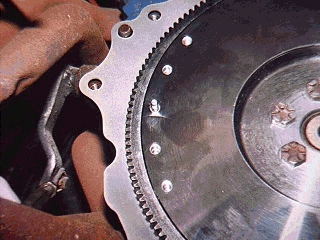
I used a later model flywheel, clutch and pressure plate setup on my conversion. The later model flywheel comes with locating pins for the pressure plate, the original did not have these. Also the later model clutch has a diaphragm release setup that distributes pressure more evenly around the pressure plate surface than the original clutch that uses the three finger release setup.
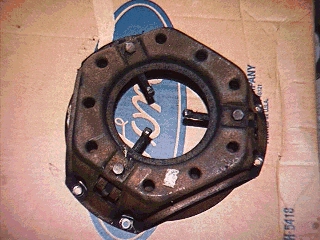
The later model pressure plates use a diaphragm release setup that distributes pressure more evenly around the clutch surface.
The clutch plate is the same for both pressure plates but it is best to buy them as a set. The later model throw out bearing will not work so you have to use the original throw out bearing, there are two different kinds available so get the one for the 10 1/2 inch clutch.
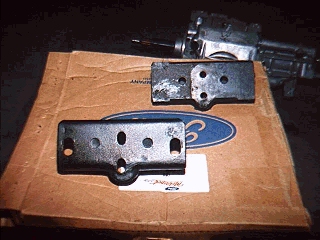
The original mount (top) uses the center holes, the T-5 Mount for the swap uses the outer holes.
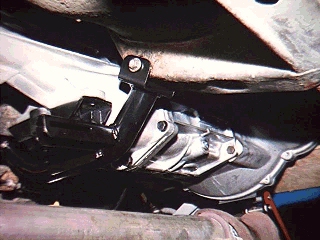
Once the clutch is installed bolt on the bell housing and the T-5 transmission. The original cross member and mount will not work and must be replaced, you can order these from Sacramento Mustang (and others).

Once everything is bolted in place you need to measure the drive shaft for length. Place the T-5 yoke in the transmission and push it all the way in then pull it out about 1 inch. Measure from the center of the u-joint cap at the yoke to the center of the u-joint cap at the pinion flange, this is the length you will need to have the drive shaft cut to. You need about 1 inch of free play for movement as the rear end and transmission move while driving to prevent damage to the transmission.
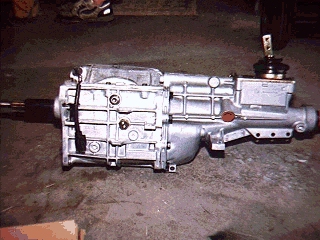
For the shifter you can use the T-5 shifter but it puts it a little out of reach compared to the original one. I had a Mr. Gasket shifter laying around but if you have a T-10 and Hurst Competition Plus Shifter you can do the same, cut the shifter off at the base, drill 2 holes through the shifter near the bottom and bolt it to the T-5. Once the shift boot is in place you can't tell it has been modified. Mustangs Unlimited also sells a shifter that looks like the original Mustang top loader shifter to fit a T-5 if you want the original look.